Wednesday, October 20, 2010

Day 80-90- From Stark to Stunning!!!!!!

Remember THIS house? The one I bought back on April 1st? It was cute. It had character. It was also rotting on one corner, had two layers of old siding, 3 layers of red roofs, a lack of gutters, a car port that was about to fall off by itself, ...and that was just the exterior problems! Yes, I will agree with most of you that I was insane. But I will also pat myself on the back and know that I did it. It is amazingly beautiful and I love every corner of it.
Especially my front door. :)
And all of you are welcome to come and knock on this amazing front door. You may be greeted by a big barking dog or two screaming children but I will show you house that I love and will explain the time and challenge that went into it (if you are interested) or we can just actually SIT on furniture and take a deep sigh that I did not invite you over to help me knock down a wall! :)
More Interior pictures to follow! (I promise)

Day ?-85- The 4 R's: Reduce, Reuse, Recycle & Retrofit

So I began with the first R- REDUCE the size of the 4th bedroom which increased the size of the kitchen and created a new hallway to the back yard. One of the reasons this house worked for me even though everyone thought I was insane was because it had a 4th bedroom...or as I saw it, an Office! In my previous house my office had always been open to the rest of the house- usually part of that second living/family room that no one uses for the proper purposes. Needless to say it is hard to get away from "work" when it is always staring at you. So essentially for this room I took at 12x14 bedroom and built within it a 9x9 office. It is small but cozy.
But with my change in plans to remove the side kitchen door and put in a new back door- kinda screwed up my office plans. It worked out great for my kitchen and I did have fun tearing down the wall...but now the shelf I was planning on using in there to hold all of my work library was now not going to fit...but I did have a great niche for built-ins...but that just meant more money being spent. boo.
My new office entrance is shown above (which eventually got a pocket door).
Here is the new built-in shelf niche below:
I wasn't sure how I was going to do the shelves but I had put my dad in charge of taking down the closet bi-fold doors in my bedroom and he had a brilliant REUSE idea...Can we reuse these bi-fold doors as shelves? And this is the reason I surround myself with smart people. And so we did!! We RECYCLED the doors as shelves and RETROFITTED them to fit within the niche.
They look pretty sweet and are now filled top to bottom with books...I even had to add more. And nobody can even tell they use to be doors, it is pretty sweet. Pictures to follow!

Sunday, September 12, 2010

Day 75-79- Kitchen Madness

So for some reason I had put the kitchen as last on my list to make decisions about...which I am regretting now seeing as how I have now lived here for 2 months (way behind on the blog btw) and still do not have a working kitchen sink...ANYWAY, let me try get back to mid June when my kitchen was getting updated...extended...renovated...not sure the word to use here.
At the beginning I decided I would keep the kitchen cabinets and just add onto them, thinking this was a cheaper route. I think it did save me some money and left some of the original character...but it wasn't cheap adding what essentially was custom cabinets and it pushed my timeframe out about 2 weeks. I could blame this on the contractor who didn't bother to show up the fourth day or anytime thereafter but I would have been on the ball they probably could have gotten built a month before. So here are some mid-build pictures for now and hopefully once I actually post the final pics I might just have countertops and a sink!
In the picture below the fridge will go on the left (where the stove use to be). Existing cabinets remain past the window on the right.
In the picture below the cabinet to the right is where the side door into the house use to be. I was able to add a dishwasher, move over the existing base cabinet for re-use, add a trash pull out and then wrap the cabinets around the other side. Essentially I added 2 feet in length to the kitchen but by removing the side door I doubled the size of my cabinets and countertop. (The microwave is sitting where the sink will be).
In this last picture the bulkhead above is where the wall use to be. The stove and microwave niche was added and the opening to the right leads to the new back mud hallway and back door.
And we now enter Crunch Time!!

Day 73-74- Shower with a Stranger

Soooo...you might think the title post is weird but that is essentially what happen...kinda. A new neighbor down the way stopped by on a Saturday morning. He is a tall friendly older man who loves to work on houses as his hobby and also likes to help people out whenever he can. We will just call him Godsend for now. Well I typically will not turn down help so needless to say I took him up on his offer of trying to help me get some misc. stuff done.
Now although I may at this point be semi-talented as a tile-girl the shower surround really intimidated me. And by intimidated me I mean it scared the crap out of me. I mean tiling a shower is serious...there is alot of water in a shower and if you screw it up you may just screw up alot of other things down the road as water slowly leaks into your walls...yeah. So needless to say it was something I kept putting off which essentially meant that I kept putting my plumbing off (aka toilet) from being installed because I wanted the plumber to come back and be able to do it all at once. So needless to say on this Saturday morning I had a large leering goal ahead of me and was not sure about pulling it off. And this is what led to the stranger and I sitting in the bathtub together. Now let's just say that you get to know someone pretty quickly sitting in a bathtub together! But he ended up being a very sincere guy and got me started on getting 6 rows straight and pretty across the back. The rest was up to me though!
How do you think I did?
Grouting from tub to ceiling was a bit messy and seemed to take forever but I was so excited about the little glass tiles that it kept me motivated. I left it very simple, very neutral, but it also went perfectly with the beauty of the floor. So next time you are here you will have to join me in the shower! Ha!

Tuesday, September 7, 2010

Day 69-72- Get Out While you Can

So I went on my anual trip to Chicago for Neocon, tried not to think about the house or the lack of work being done while I was gone. Sometimes you need to take a moment for yourself, re-group and come back more focused....right??
I am sure somebody did something while I was gone, but since I have been such a slacker at this blog all summer I could not tell you what or who that was and I was obviously not there to take a picture of it. ha!

Tuesday, July 27, 2010

Day 67 & 68- Lets Get Crazy

So I had had this crazy idea pictured in my head for my bathroom tile which I typically do all the time and then can never find what I am actually looking for. Well this time it actually came true and I LOVE it! My main bathroom (which is the only bathroom on the first floor...and I guess the "master bath" as well?) is off the main hallway on the first floor. I wanted it to be pretty stunning without spending a ton of money. Which meant that I was going to have to do it myself as much as possible. What I paid for: Wing wall built, Greenboard on all the walls (special drywall made for wet areas) and Hardyboard around the tub (special mold-proof board used for underneath tiles) and install of the tub itself. I actually had room for a 6'tub to go into this space but with the width being skinny it wasn't worth the $1600 price tag for the extra foot in length. So I decided to do a standard 5' tub and would spend the money on some really cool tile. I ordered a vanity online from Ebay and bought a toilet at Lowes which would get installed by my plumber...after I did all of the tile.
So I found a large 15x15 white porcelain tile at Lowes and an accent glass tile that had a mix of different nuetrals and also had some travertine pieces mixed in. I wasn't sure at first if you could really put glass tiles on the floor but after talking to some experts I found out it wasn't a problem (just don't put large pieces that you could slip on obviously).
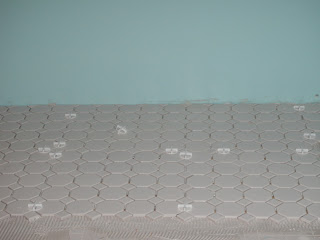
The tile adhesive looked like vanilla ice cream...
note to self: don't tile when hungry.

Monday, July 26, 2010

Day 66- Hardest tile job EVER

So I have tiled twice before at my old house. I did the hallway bathroom floor and a small mosaic countertop to a built-in buffet. So I thought to myself- Hey this is definitely one place I can save myself a TON of money. And honestly just with the tile jobs I did I probably could go on that show "10 Grand in your Hand". (I should have gotten a quote first just so I would know how much I really did save). Anyways, needless to say I was once a novice and now I would call myself "experienced"...but still not an expert.
So the first room that was ready for Tile was the 2nd floor bathroom. I wanted to do something very simple so that the floor could go with any decor scheme because if I am living here for 13 years then I am not sure my 16 & 18 year old teenagers will want a bright blue and orange fish bathroom...but you never know! I was glad to be starting with this room too because it was small and there was nothing to work around except a shower basin.
Well all I can say is even though the tile is awesome (and I am awesome) this turned into the hardest tile job ever. Essentially I took what i think was suppose to be a backsplash wall tile and turned it into a floor tile and there were sooooo many grout lines and so many crooked walls and soooo many tile cuts that it took me 5 hours to lay it, 2 hours to grout it and 2 hours just to go back and wipe off the grout because it was drying too fast for me to catch up with it. Anyways I don't think I can describe the angony on my knees and the fact that I did all of this on a 2nd story at 85 degrees with no power except a fan that was blowing directly on me (and therefore drying the grout). BUT...it does look fabulous! (if you don't look too close)...
the things sticking up below are spacers if you haven't done tile before...

Day 65- Living in the Dark Ages

Ok, so I am going to go back a moment and tell you the real story on the siding...and how it put me in the dark. So the honestly the siding that I blogged about below was really only about 95% complete at the time. On Day #65 we had a HUGE issue which really could have killed a few sub-contractors. BUT, let me start with a back story to explain. So I had to get all new wiring for my entire house. There was some existing knob and tube wiring running through the house which is NOT safe. I was first going to pull out the knob and tube and re-wire as needed and because we could not see some areas in the ceilings we went ahead and re-wired the whole house. So for the first month while new wiring was being run I had one outlet that worked and it was down in the basement, so lots of extension cords and such were run all over from the basement. Then when we were actually ready for Indianapolis Power and Light to come out and power up my new meter they took their sweet old time of 2-1/2 weeks. They powered to the new meter but it looked horrible with the new whips going to the original porcelain anchor on the house which was 3-4 feet from my meter that had been moved over for my new back door location. I was told by my electrican that they would install a new anchor next to the next meter. Problem being that this was wrong- my electrician should have installed the new anchor because IPL doesn't do that anymore. So needless to say when my new back door got installed you could reach up and touch the electrical lines...awesome. So I called IPL and about a week later a guy showed up who then informed me about the anchor and that I would need to move my meter base over 1 foot, extend a pipe up to 13' above ground (which I would have to custom bent around my new gutters which hadn't been installed yet) and then attach it to my top dormer for support because my house does not have a soffit. OR...I could go underground for $500 and he would allow me to not have to move my meter base over. Well I thought about it for about 5 minutes while we stood in the rain discussing this and decided that once I paid my electrican and a custom pipe bender to re-work everything I would probably only be saving myself $300 to make something that was going to look hideous. So I decided to fork out the money and pay IPL $500 and a Trencher $400 to get my power underground and never think about it again. It was a good decision...just hit my budget kinda hard.
Soooo...while I am waiting on IPL to come and change it to underground (another 2 weeks) my siding guys are trying to finish my house. They were working around the new back door, standing on a metal ladder ledge strung between two other metal ladders they moved the nuetral line with their hand in order to get a siding dimension underneath it and the old porcelain knob on my house SNAPPED IN HALF! The 120' drop between the telephone pole and my meter was now hinged on the top of my meter base which was unscrewed from the house because they were putting siding up and therefore SNAPPED at the top of my meter and set fire and sparks flying and fried my new meter base. Needless to say as soon as the sparks started flying the two sub-contractors JUMPED off their metal ladder basin and hit the ground running. Now if only I had had a video tape there to capture the chaos...instead a get a phone call from a contractor who is kinda shaken up because he almost died and is not sure what to do. I called IPL emergency who came out right away and at least got rid of the live wire laying in my yard. So now the problem was I had NO power at all and decided I would just wait on the underground to be trenched and laid so that I didn't have to pay IPL to give me temporary power. Luckily my neighbor was nice enough to let me run an extension cord from his garage for what turned into two more weeks. THANKS NEW NEIGHBOR!!!! I definitely owe him some cookies or something!!

Tuesday, June 29, 2010

Day ?-65: Siding is Complete!!

So I probably can't really tell you the day that siding started or was finally complete. Let's just say it was such a freaking process...but I got a totally sweet deal! Essentially my contractor quoted me an amazing deal, then he got screwed on his end and it ended up costing him probably as much as he was charging me (not to forget the labor that actually went into it). So although it took them 3 weeks to actually completely finish it...it was worth every penny (or non-penny?) spent. Check out the progress:


And if you don't remember the original:

And the 90% complete. Still needs painted, windows scraped and gutters...but so far it is an amazing transformation!

Wait till you see what I have planned with the front door!!

Day 41-50- COLOR!!!!

Soooo...I am an interior designer right? And I do love color right? I may have gotten a bit bold in some areas...maybe not enough in others but I think it all works well together. One thing that is weird/different about this house is I have alot of blue. I am not sure I really even love blue but somehow I have three different blues in my new house and I think I really like them all...for now at least.
So here is something kinda pitiful...I put out a plea on facebook for painting help. I offered cold beverages and pizza...and one person volunteered. (love you friend!) The other two in the pictures are my sisters...they are kinda obligated by blood to help paint but I do love them too and will always return the favor! And with the four of us (and no interuptions) we knocked out the second floor- it was exhilirating!
So let me know what you think of the colors- these show about 1/2 the house thus far!
The kids new 3/4 bath upstairs: (bright aqua)
Lilly's new room: (princess pink)
The master/main/hallway bath: (breezy blue)
The "mud hallway/laundry niche": (screaming red)
The improved/expanded kitchen: (avacado green)
(Those are all my made up names by the way so don't go to Lowes and ask for Avocado Green...it probably exists but might not look the same!) Haha. So what you think? No worries if you think it is too much...I didn't show all the beige walls in between!

Friday, June 18, 2010

Day 40- 81 Square Feet

So do you remember the Attic Dormer/Birds Nest/Scary Room? Well it was the front A-frame to the house, an unfinished attic space that was kinda creepy and it was behind the little door you see below.
My brilliant idea was to turn it into a toy room for the kids, gut the space, add a window in place of the vent, insulate and drywall. So here it is gutted:
then we added side walls and insulation: Removed the vent, installed a window and drywall and mud:
And here it is primed and ready for some toy niches and a built-in desk space.
This space and the upstairs in general are definitely the biggest transformations to the house. So far I think it is pretty exciting! I added only 81 square feet to my floorplate and I think increased my value by at least $3-5000. Now I call that some bang for you buck! What do you think?

Day 39- Where Knights will Sleep

Well Lucas might have got the small end of the deal in regards to size of his bedroom but I made up for it with a very cool bed fit for a Knight (sorry you will have to wait in suspense!)
So...old room with wood paneling and carpet:
And new room with drywall and wood floors underneath! Sweet!
The room didn't have a closet before but we moved the entrance from a hall closet to a spot behind his door (if you remember this brilliant idea) No accent walls for Lucas since his dresser is green and his new bed is...
oh snap I almost gave it away! hehehe.

Wednesday, June 16, 2010

Day 38- The Princess' Tower (i.e. Lilly's Room)

The tower use to be dark and gloomy...definitely not fit for a princess.
The difference between the paneling and drywall is honestly insane. The space is so much brighter and feels even bigger.
I actually did pretty good here with the same picture positioning- check out the progress:
Existing:
1/2 demoed":
And drywall:
And the paint request from the princess was originally pink...then she changed it to "Rainbow Colors". Being her assistant I did talk her into staying with the pink and adding the rainbow colors into her bedding. She thought that was a perfect idea!

Day 38- MORE Drywall and a Door!

So do you remember the amazing wood paneling and great cabinet that we sledge-hammered out? And don't forget the ugly tile floor and barn fan? Needless to say I do not miss any of it.
Here it is with some fresh drywall and believe it or not the floor is actually wood underneath all of that drywall dust and mud you see below.
And here is what the 4th bedroom use to look like before I shrunk it and put in a back hallway, turned this closet into a laundry niche and added a back door...
So the wall to the left is my new office which gets a pocket door and this new fabulous door leads out to my new fabulous back yard!
but be careful because it is about a 42" drop once you step outside...I guess I might want to get some stairs built.

Tuesday, June 1, 2010

Day 36 & 37- Exterior Facelift

The exterior has definitely gone through some changes. The original plan was to keep the aluminum siding, patch and paint it until I could afford to do something different later. So the exterior would have a new roof, new attic window and be painted...that was the original plan.
Here is the original house...
Here it is with a new roof and carport removed...
Here it is once we realized that we couldn't perfectly match the existing aluminum siding and that I was spending 1/2 the money trying to patch and fix it as I would be just putting all new siding up. Soooo...off came all of the aluminum and the picture below is actually showing all of the original wood siding that was underneath the aluminum siding. It also shows my new attic octagon window and if you can see where the black is on the left that is actually showing the original window placement to the kitchen. If I would have had the money to change my kitchen cabinets I would have tried to put a window back in this location. What I found very interesting is that the house (underneath the wood siding) is covered is 1"x6"s vs. plywood that they use now days. You can see this around the new attic window.
I am thinking my neighbors probably started to wonder what the heck I was doing when they saw the house looking like the above. But once all the wood came off it looked better in Tyvec wrap than it did in aluminum siding if you ask me.


Here is a picture of the old carport and side door in case you forgot what it used to look like...
And here is a picture of the carport gone, side door closed up and new back door opening. Much better right??
New siding is almost done...you will have to stay tuned to see!